
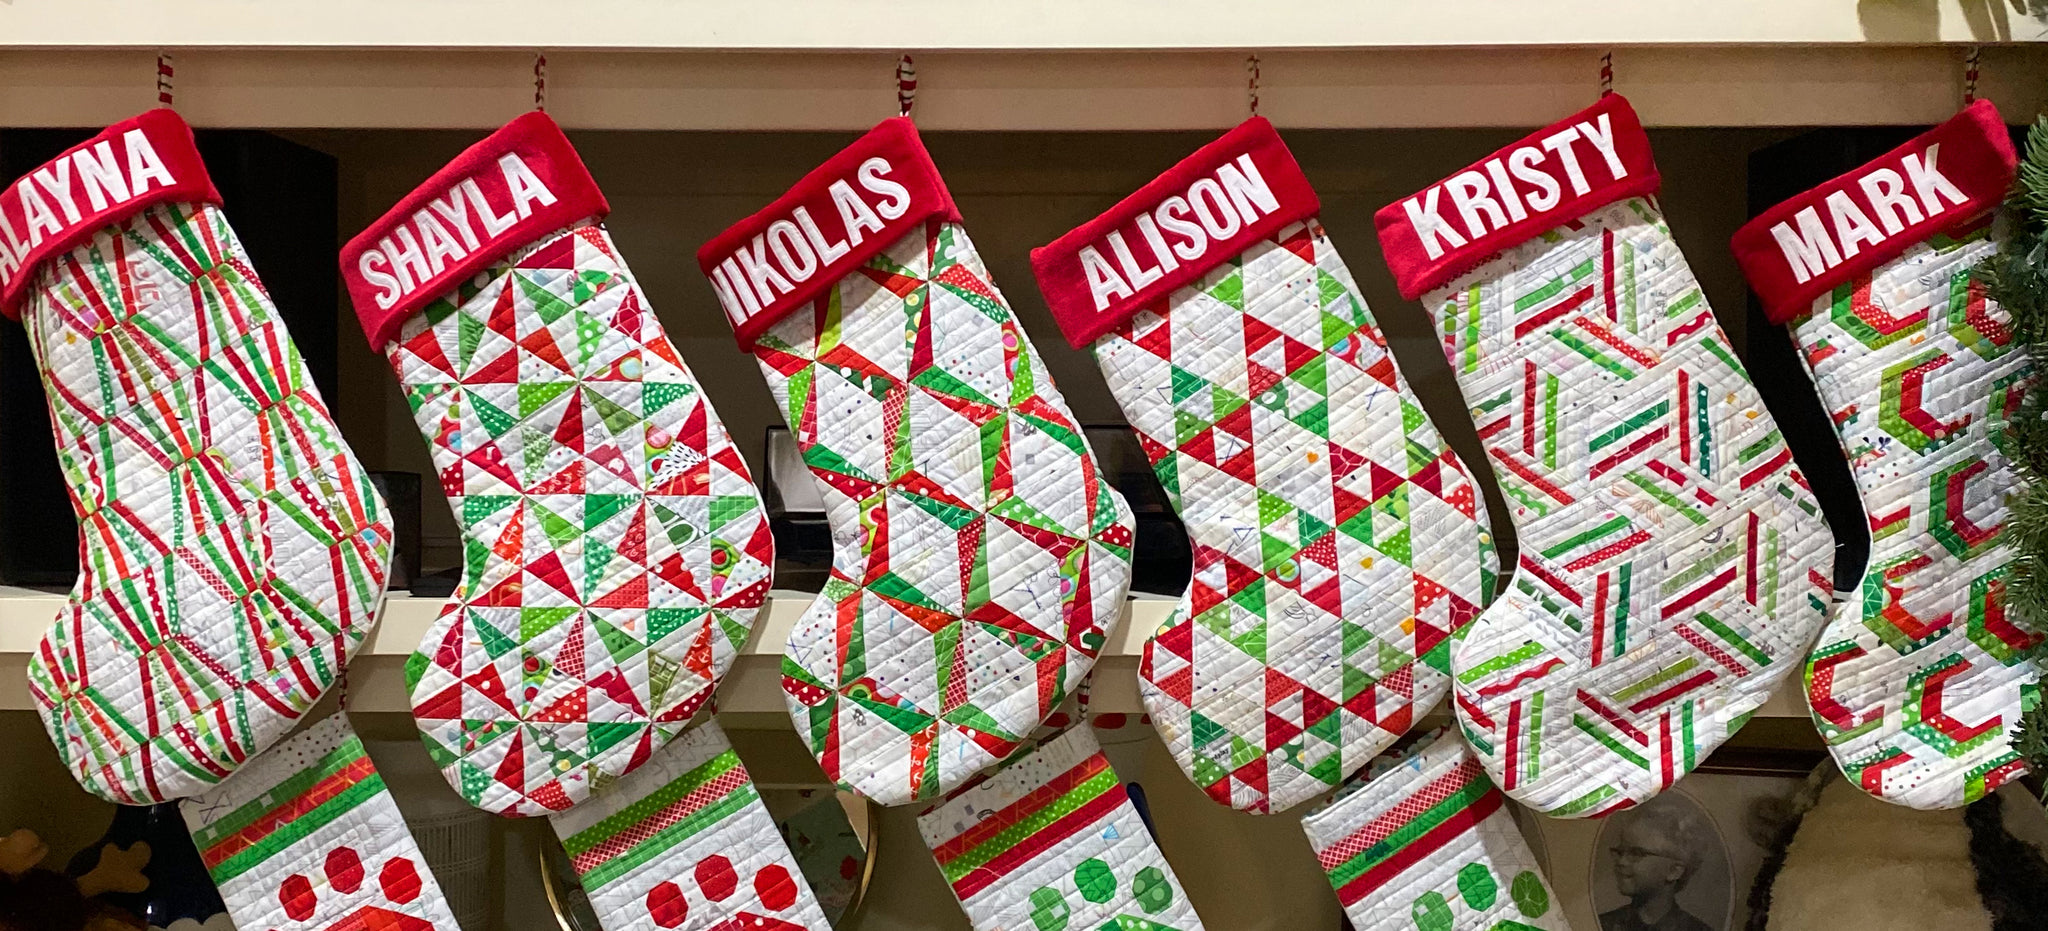
Turn Mini Quilts into Christmas Stockings
What better excuse to make the whole family new Christmas stockings than a new sister-in-law? My grandma cross-stitched our family stockings and they are beautiful! But we decided to make our new ones with a little more modern flare and use our mini quilt patterns to do it!
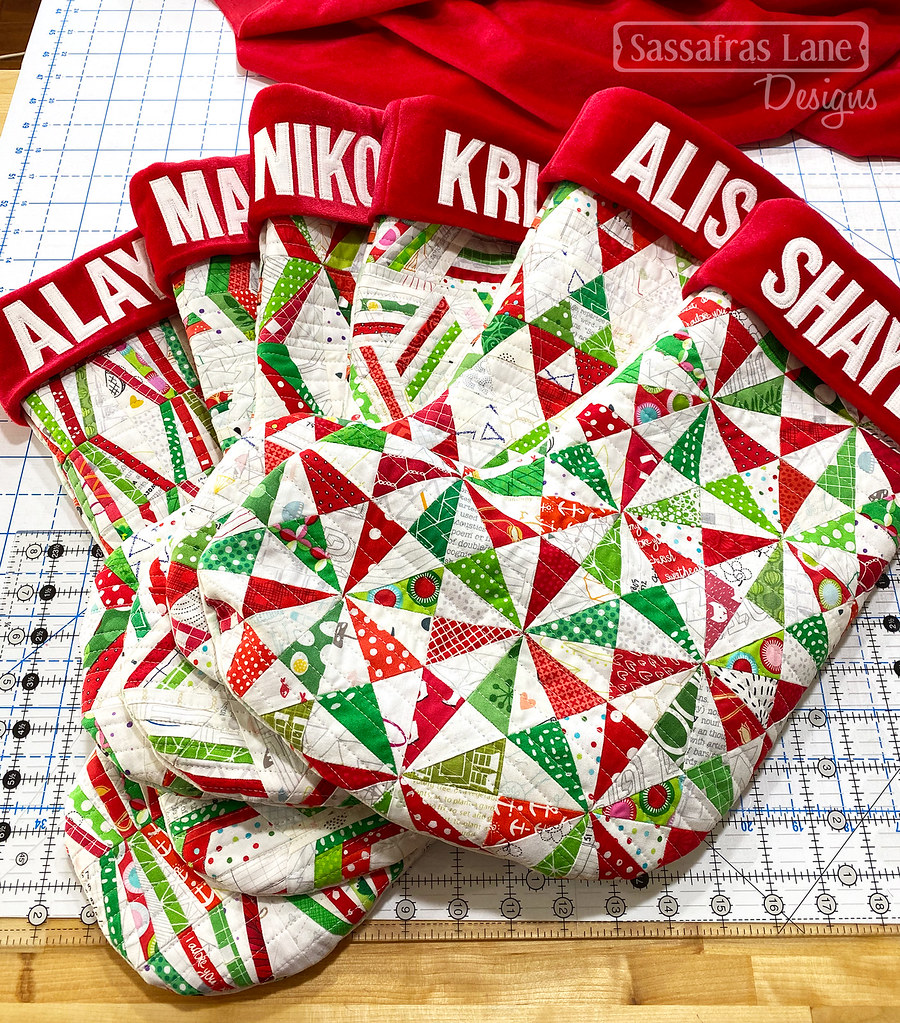
To make the stockings, I made six different mini quilt designs with red and green fabric scraps and low volume backgrounds. I love how they turned out and it was almost painful to cut them up into stockings, but boy am I glad I did! Here is a picture of a few of them on my design wall!
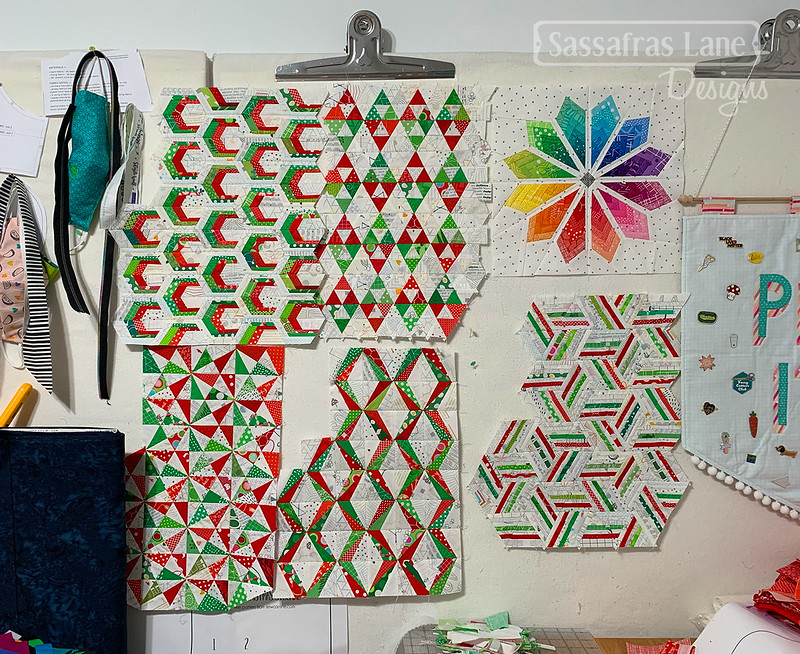
How do you choose a mini quilt? There are so many to choose from! We used our Mini Darby Road, Mini Prism Parkway and Mini Lantern Lane patterns and down-sized our Jungle Junction and Quadrant Court patterns. You can use any mini quilt you’d like! I think as our family grows, Mini Diamond Detour, Mini Privet Drive and Mini Canyon Boulevard will join the crew! Take a look at all of ours HERE.
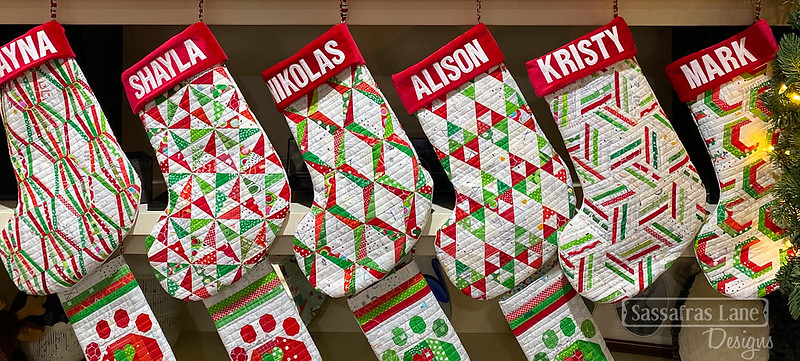
Kristy quilted all the stockings (and backs) with straight horizontal lines ¼ inch apart. We then cut them out and turned them into custom stockings for each of our family members. Just in case you would like to make some new stockings out of mini quilts, below is how we did it!
Materials
- Mini quilt pattern of your choosing
- Stocking Pattern (download here)
- Fabric for Stocking Back and Lining
- Faux fur fabric or Velvet for Cuff
- Letters for Names (download here)
- Fusible Fleece or thin Cotton Batting
- Light-weight interfacing for Cuff
- Fusible web, tearaway stabilizer & Name fabric (if customizing)
Cutting
- Stocking - mini quilt approximately 12” x 16”
- Stocking Back - 12” x 16”
- Lining - (2) 12” x 16”
- Hanging Loop - 1” x 6”
- Cuff - (2) 6” x 8” (if appliquéing, leave larger and trim down after)
Make the Stocking Front
Pick out a mini quilt pattern and make it at least 12in x 16in - this will be your Stocking. Quilt your Stocking and Stocking Back with horizontal straight lines app ½” apart. We used fusible fleece as our batting, but a thin cotton batting will also work. NOTE: we did not use a backing fabric.
Make the Hanging Loop
Fold the 1” x 6” piece in half lengthwise, open back up and fold edges into the center. Fold in half again and press. Your loop should measure ¼” x 6”. Top-stitch close to both edges. Fold in half so it measures 3” long.
Make the Cuff
Fuse interfacing to the backside of the Cuff pieces. Personalizing the stocking? Now is the time! Prepare the letters of the desired name for fusible appliqué. Center the letters of the name onto the top half of one of the Cuff pieces, fuse and appliqué in place using a tearaway stabilizer. Remove tearaway stabilizer. If you left the Cuff piece oversized for appliqué, now trim to 6” x 8”, be sure the name is centered.
Cut the Pieces
Lay the stocking pattern, right side up, on top of the right side of the Stocking/Mini Quilt. With scissors, or small rotary cutter, cut the Stocking out. Lay the stocking pattern, wrong side up, on top of the Stocking Back fabric and cut. Layer the Lining pieces right sides together and use the stocking pattern to cut out two mirror image pieces.
Assemble the Stocking
Layer the Stocking front and back right sides together and sew along the edges, leaving the top open. Repeat this for the Lining, again, not sewing the top together. Trim or clip the inside curve and turn the Stocking right side out. (Leave the Lining with the wrong side out.) Slide the Lining inside the Stocking, wrong sides together, and baste the edges together along the top of the Stocking.
With the raw edges at the top of the Stocking, push the Hanging Loop into the Stocking and baste the loop to the top of the back of the stocking.
Layer the two Cuff pieces right sides together and sew along both sides. Fold in half to make a loop approximately 3” x 7½”. Push the Cuff into the Stocking with the right side of the cuff inside the stocking against the lining with the personalization in the front. The Hanging Loop is now between the Lining and the Cuff. Match the side seams of the Cuff to the Stocking side seams. Sew the Cuff to the top of the Stocking, back stitching over the hanging loop to secure. Pull the cuff out of the Stocking and fold to the outside. Voila!
